Diagnosing Brown Leaf Tips on Dracaena Caused by Tap Water Fluoride
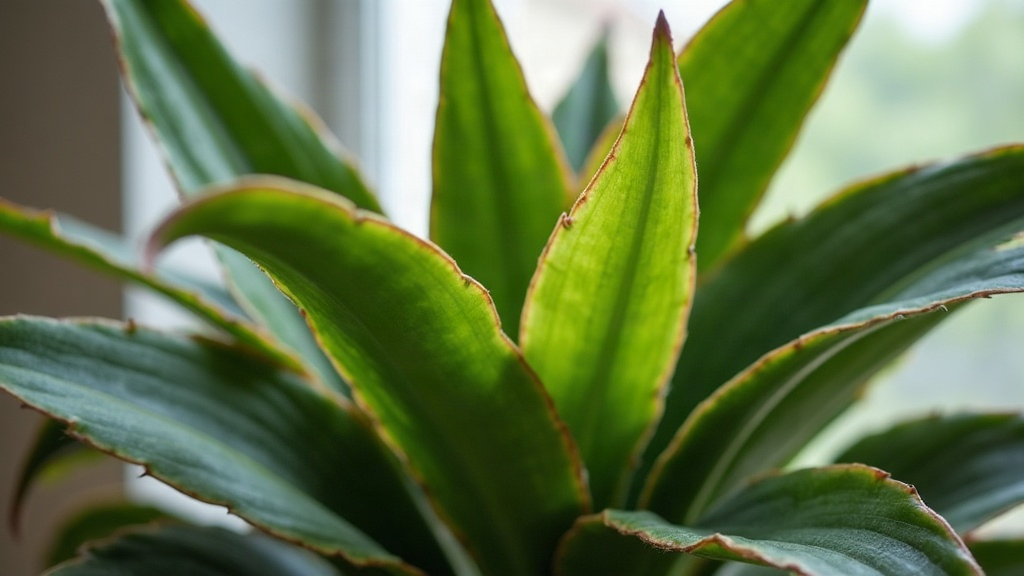
If your Dracaena’s leaf tips keep turning brown and crispy no matter how well you water it or how much light it gets, don’t reach for a fungicide. Nine times out of ten, the real problem is fluoride building up from your tap water. Here’s how to spot it, rule out the other suspects, and actually fix it with a few watering tweaks.
Why Dracaena Is So Sensitive to Fluoride
Dracaenas (think Dracaena marginata, Dracaena fragrans “Massangeana,” or Dracaena deremensis) are notoriously touchy about fluoride. More so than just about any other houseplant you’ll find on a windowsill. Fluoride shows up in plenty of municipal water supplies, usually added on purpose for dental health, and it can also turn up in well water depending on your local geology.
Here’s the thing: fluoride isn’t something the plant actually uses, unlike nitrogen or potassium. It just sits there, slowly collecting in the tissue at the leaf tips and margins, the parts furthest from the roots, over weeks and months. Once the plant hits its tolerance limit, those cells give out and die, and you get the classic dry brown edges.
How to Recognize Fluoride Toxicity
Watch for this specific combination of signs:
- Location: The browning starts right at the leaf tip and sometimes creeps along the margins. It’s not random spots scattered across the leaf blade.
- Texture: Dead tissue feels dry, papery, almost crunchy. Nothing mushy or waterlogged about it.
- Border: You’ll often spot a thin yellow halo separating the healthy green tissue from the dead brown tip, like a faint warning line.
- Pattern across the plant: Older, lower leaves usually take the hit first and hardest. Makes sense. They’ve been soaking up fluoride-laden water the longest.
- Timeline: This isn’t an overnight thing. Symptoms creep in over several weeks.
Ruling Out Other Causes
Brown tips aren’t always fluoride. A few other things can cause something similar:
- Underwatering or low humidity: Tips brown pretty evenly across both old and new leaves, and you’ll often see curling along with it.
- Overfertilizing: Salt buildup browns leaves too, but it tends to hit newer growth as well, and you might notice a white crust forming on the soil surface.
- Chlorine or chloramine: Looks a lot like fluoride damage, but chlorine usually breaks down faster if you let water sit out for a day.
- Root rot: Totally different picture here. Mushy, yellowing leaves, a sour or foul smell coming from the soil. Nothing crisp or dry about it.
So if you’re seeing dry, marginal browning concentrated on the older leaves while new growth stays clean, and especially if your tap water is fluoridated, fluoride toxicity is your most likely answer.
How to Fix and Prevent Fluoride Damage
1. Switch Your Water Source
- Go with distilled water or reverse osmosis (RO) water. Both strip out fluoride effectively.
- Rainwater works great too, and it’s free if you’ve got a bucket and a roof.
- One common mistake: letting tap water sit out overnight to “dechlorinate” it. That gets rid of chlorine, sure, but fluoride stays put.
2. Flush the Soil
Fluoride doesn’t just float through, it accumulates in the potting mix over time, like sediment settling at the bottom of a glass. Give the pot a thorough flush with distilled or rain water, letting it drain through the holes two or three times in a row, to wash out built-up fluoride and mineral salts.
3. Adjust Your Fertilizer
- Skip superphosphate fertilizers entirely. They’re loaded with fluoride.
- Go for a balanced, low-phosphate houseplant fertilizer instead, and feed at half-strength to be safe.
4. Trim Damaged Tips
Once a tip browns, it’s done. It won’t turn green again, no matter what you do. Grab clean scissors and trim the dead tissue, following the leaf’s natural shape, and leave a tiny sliver of brown so you don’t accidentally cut into living tissue. Keep in mind this is purely cosmetic. It makes the plant look better, but it won’t stop new damage unless you fix the actual water problem.
5. Be Patient
The damage that’s already there is permanent, full stop. Any real improvement shows up only in new leaves. Give it a few weeks to a couple of months after switching your water source before you start seeing clean, tip-healthy growth coming in.
Quick Checklist
- Water only with distilled, RO, or rainwater
- Flush soil every few months to clear mineral buildup
- Skip high-phosphate fertilizers
- Trim brown tips for looks, not as a treatment
- Keep an eye on new growth for signs of improvement
Conclusion
Crispy, brown tips on an otherwise good-looking Dracaena almost always point to fluoride sensitivity, not some disease or pest problem. Switch to fluoride-free water, flush out the salts that have built up in the soil, pick the right fertilizer, and you’ll stop the damage in its tracks. Give it time, and your Dracaena will start pushing out clean, vibrant new leaves again.