How to Propagate Pothos in Water: Step-by-Step Guide
🔎 Quick tool: Not sure about a specific plant? Check our Pet-Safe Houseplants Toxicity Chart — search 70+ common plants by their ASPCA toxicity to cats and dogs.
How to Propagate Pothos in Water: Step-by-Step Guide
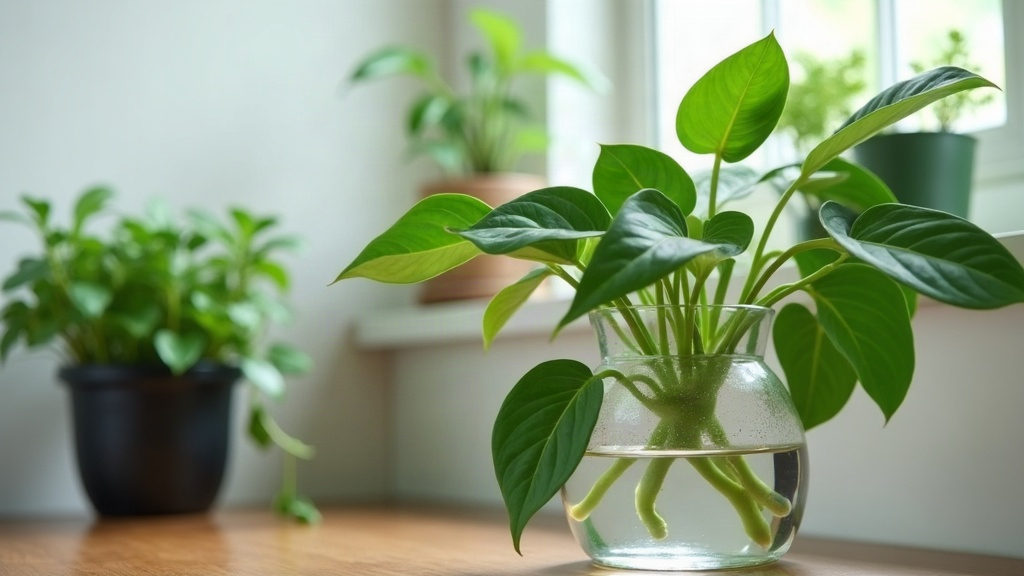
Pothos (Epipremnum aureum) is famously easy to multiply, even if you have never propagated a houseplant before. Water propagation is especially straightforward: take a healthy stem cutting just beneath a node, remove any leaves that would sit underwater, place the node in water, and give it bright indirect light. Replace the water weekly. Once the roots reach roughly 1–2 inches, the cutting is ready for soil, or it can remain in water.
Here is the complete process, including a few mistakes that can derail an otherwise simple project.
Why Water Propagation Works So Well for Pothos
Look closely at a pothos vine and you will notice small brown bumps along the stem. These are nodes, the points where leaves and tiny aerial roots emerge. Put a node underwater and it is likely to begin producing roots.
Pothos is an aroid that naturally climbs and takes root in warm, humid conditions, so it is built to grab onto new growing opportunities. A cutting can often root from a single healthy node, which makes this plant much less fussy than many common houseplants.
What You’ll Need
- A healthy pothos plant with mature, undamaged vines
- Clean, sharp scissors or pruning shears
- A glass jar or clear container, so you can watch the roots develop
- Room-temperature water; filtered or dechlorinated tap water is ideal
- A location with bright, indirect light
Step-by-Step Propagation Process
1. Choose the Right Cutting
Pick a healthy vine with at least 2–3 leaves and clearly visible nodes. Skip stems with yellow leaves, pest damage, or soft spots.
Young, flexible sections of vine usually root more quickly than thick, woody older growth. A 4–6 inch piece is a practical size: large enough to support itself, but not so long that it becomes awkward in a jar.
2. Make the Cut
With clean shears, cut about 1/4 inch below a node. A slight angle is fine. Each cutting needs at least one node, though two or three nodes often create a stronger, fuller root system.
No node, no roots. It is the one detail worth double-checking before you put the cutting in water.
3. Remove Lower Leaves
Remove any leaves that would fall below the waterline. Leaves submerged in a jar tend to rot fast, sometimes within a few days, and the decaying material can make the water cloudy or encourage bacterial growth.
Leave one or two healthy leaves at the top so the cutting can still photosynthesize.
4. Place the Cutting in Water
Set the cutting in the jar with the node or nodes fully underwater. Keep the remaining leaves above the surface.
You can root several cuttings in one container. For example, rooting three or four stems together can give you a much bushier-looking pot when you eventually plant them up.
5. Find the Right Light Spot
Place the jar near a bright window where it receives indirect sunlight. A spot a few feet back from an east- or west-facing window often works well.
Avoid harsh direct sun. It can heat the water in a small glass jar and scorch the leaves. On the other hand, a dim shelf across the room may leave you waiting weeks with little more than a stationary cutting.
6. Change the Water Regularly
Replace the water every 5–7 days. Fresh water helps prevent algae, bacteria, and that stagnant smell that signals trouble.
Use room-temperature water each time. Very cold water is not usually fatal, but it can stress a fresh cutting unnecessarily.
7. Watch for Root Growth
Small white roots often appear within 1–2 weeks. Over the following 3–4 weeks, they should become longer, thicker, and more branched.
Wait until the roots are at least 1–2 inches long before moving the cutting into soil. At that stage, it has a better chance of taking up moisture and nutrients after the transition. If you see several roots rather than one thin strand, even better.
8. Transplant into Soil (or Keep in Water)
Once the roots are established, plant the cutting in a well-draining potting mix and water it thoroughly. For the first two weeks, keep the soil lightly and consistently moist while the roots adjust from water to soil.
Prefer the look of vines in a glass vessel? You can leave pothos in water long term. It makes an easy display plant for a desk, bathroom shelf, or bright kitchen counter, though it may eventually benefit from diluted nutrients.
Common Mistakes to Avoid
- Skipping water changes, Still water can harbor bacteria, leading to rot before the cutting has a chance to root.
- Submerging leaves, Leaves break down quickly underwater and foul the container.
- Cutting without a node, A leaf stem alone will not grow roots, however healthy it looks.
- Insufficient light, In a dark corner, root growth can slow dramatically or stop altogether.
- Transplanting too early, Fine, short roots often struggle when moved into soil.
Troubleshooting
- No roots after 3+ weeks: Move the jar somewhere brighter and make sure at least one node is fully submerged.
- Yellowing cutting: This is often caused by leaves sitting in water or by water that has not been changed often enough.
- Slimy stem: Bacteria are likely building up. Trim away the affected section with clean scissors, rinse the container, and replace the water immediately.
Final Thoughts
Water propagation is one of the easiest ways to turn one pothos plant into several without spending anything. Give the cutting a clean start, bright indirect light, and fresh water each week, and you will often see sturdy roots within a month. From there, it can become a new potted plant, or stay right where it is, growing happily in its jar.